Facebook is the largest online social network and if you use your social media marketing efforts on Facebook, you could have huge returns to show for it.
Facebook is where the people are, with over 1.5 billion active users. And on any given day, over 65% of them log on.
These numbers alone makes it a valuable website for marketers, whether you’re promoting a service, releasing a product or doing market research. It is no wonder why marketers are interested in figuring out how to reach their target audience using Facebook.
So in reality, you really will need to have a Facebook business page…
If you are going to have a Facebook business page, you should start with a personal account. I have read there are ways to only having a business page, but it is recommended you have both. Note:- your Facebook business page won’t interact with your personal page and your personal information is not public on the business page.
Most people these days will have their personal account already but just in case you don’t, here’s a quick overview for those complete newbies out there.
Of course, if you already have one, skip this section and scroll down to ‘Create a Facebook Business Page’
Create a Facebook account
All you’ll need to get started is an email address.
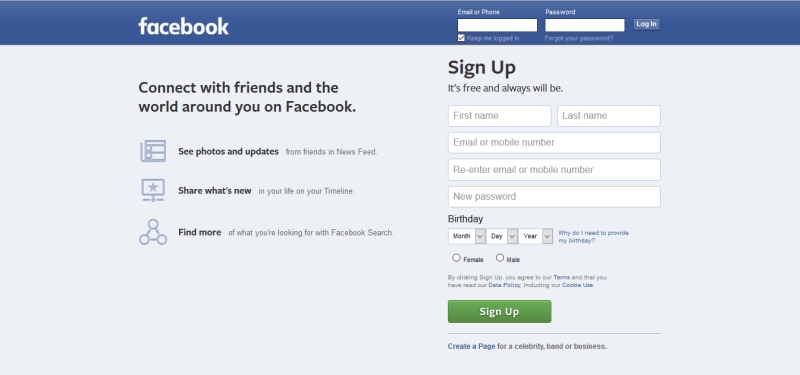
> Go to www.Facebook.com and fill in the details on the Sign-up form
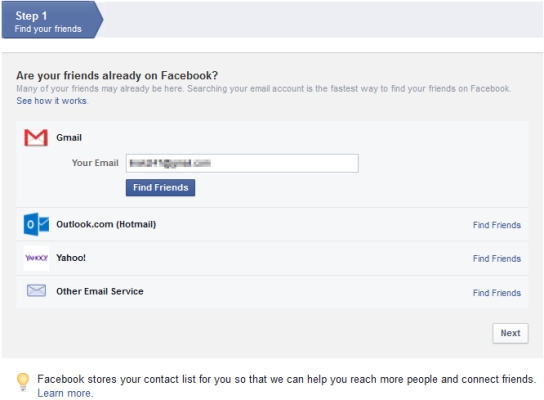
After completing the form, click the “Sign Up” option… you will see the following screen…
You can skip the next couple of steps (you can always do these steps later) and click next to proceed.
At this point they’ll ask you to confirm your email address to complete the sign-up process.
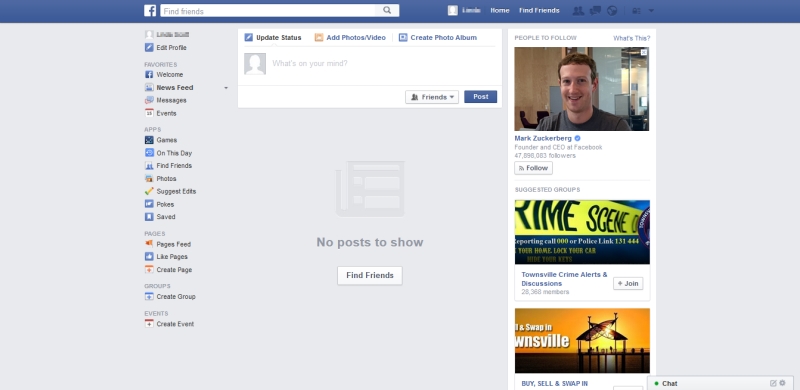
Confirm in your email and wallah! You now have your Facebook personal page like so…
You can of course now fill out your profile information, make some posts, and also add a Profile Picture & Cover Photo to your page. You can come back and do all of this later of course.
If you need to know how to upload you profile pics, Facebook will help you, click here >> Facebook Help Center
Great! You’re all set up. Now to set up a Facebook Business Page.
Set Up a Facebook Business Page
To set up your Business Page, just follow these steps
1. Log in to Facebook
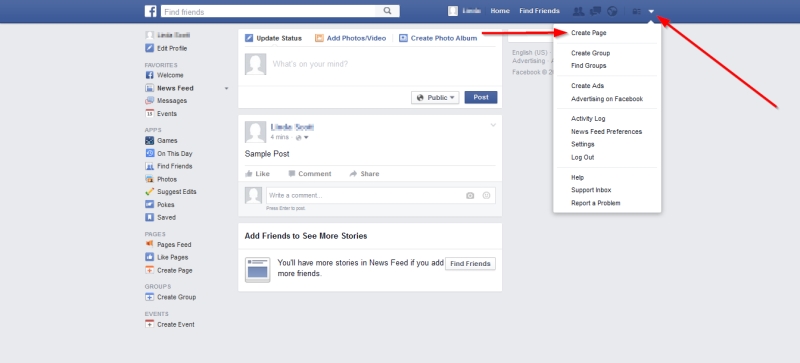
On your personal page, click on the arrow in the top-right corner, and choose ‘Create Page’
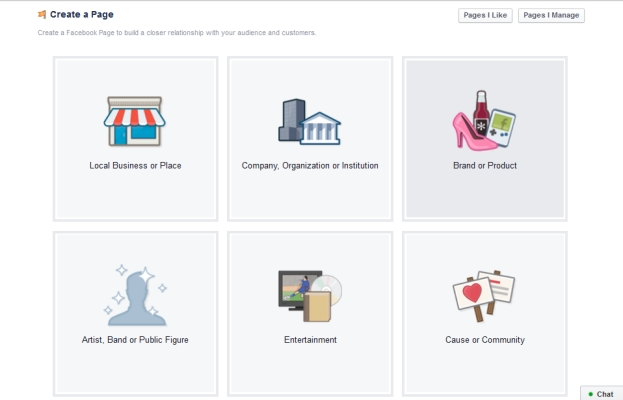
Select a page group suited to your business. Each type explained below to help you select the right one.
(I will be choosing Brand or Product here).
Local Business or Place
Only select this if your business has a physical location where your customers come to. If you choose this group, Facebook will automatically change your ‘page’ to a ‘place’. This allows users to use the ‘check-in’ functionality so commonly used on Facebook.
Company, Organization or Institution
If your business is mostly run online and/or has physical but multiple locations, then you should select this group. This keeps your page as a page. A ‘place’ can’t deal with multiple locations.
Brand or Product
This type of Facebook Business Page is ideal if you own an online business, promote products, services or brands, or your products and services are sold through multiple distributors that do not have a physical location.
Artist, Band or Public Figure
This type of page is perfect for promoting ‘you’. If you are in the public spotlight and your business is focused on promoting, then this page is the appropriate selection.
Entertainment
If you are looking to promote a book, magazine, tv show, movie, radio station, or any other media, select the Entertainment page.
Cause or Community
If your organization is a community of action that supports specific issues, campaigns or nonprofit organizations, select the Cause or Community page.
If you realize later on, that you have made a mistake in your choice of page, you can always change your page type and category. You can do this after you’ve created the page through the admin control panel.
Moving on…
3. Choose a category
Once you have selected the right group, a drop down menu appears…
Choose the category that matches your business. You may not find the perfect match, but for the most part, this isn’t particularly important unless you are a local business.
4. Choose a name for your page.
Take some time here as it is the first thing people see when they see your page. It is recommended to keep it short. The general rule of thumb online is that shorter is better.
Note:- You will only be able to change your Page name up until the point you have 200 likes (or fans) so you have a little while to play around with it.
Agree to the Facebook Pages Terms.
Click Get Started.
5. Set Up Your Page
In this instance I called my page ‘Learning Lab’ and this it what you will see.
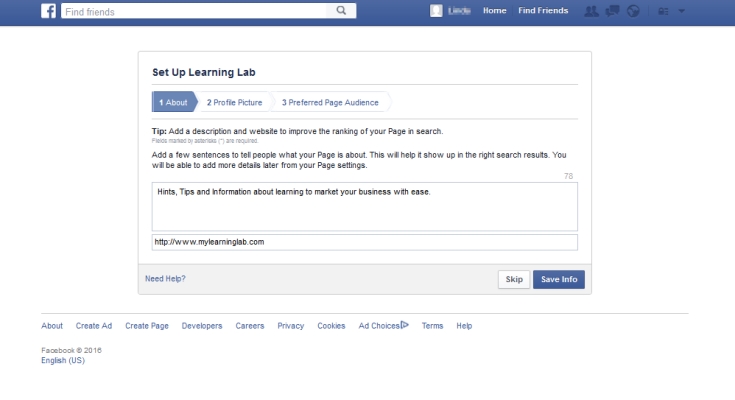 Here is where you will be taken through some steps to complete some ‘about’ information.
Add a description and your website address, if you have one. I have filled in a demo description and address in the screenshot above to give you an idea. Click on ‘Save Info’.
Next you can add a profile picture.
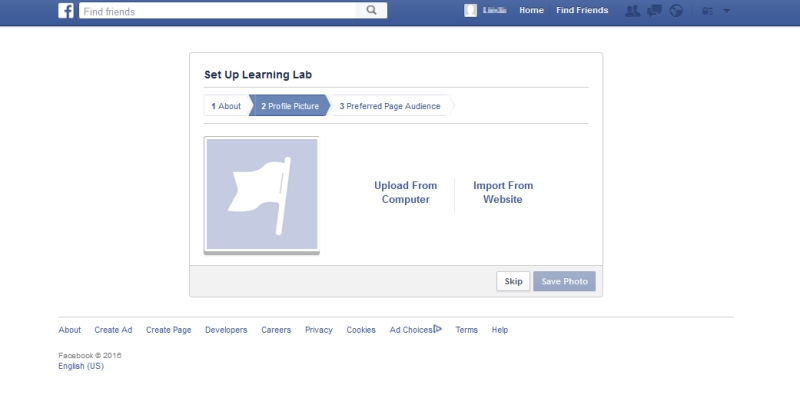 The recommended size of a profile pic is 180 x 180 pixels. Upload a pic from from your computer if you have one, and click on ‘Save Photo’, or skip this for now, and play around later. For the purpose of this tutorial, I skipped this step here.
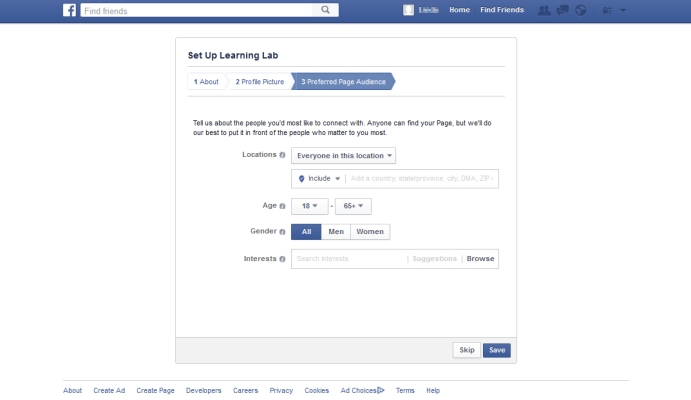
Now you will be asked to add your preferred page audience.
I am also skipping this step for the moment. You can too skip this or follow on with what Facebook tells you to do. Note:- You can do this later from your page when you know more about your ‘Preferred Audience’. Click ‘Save’.
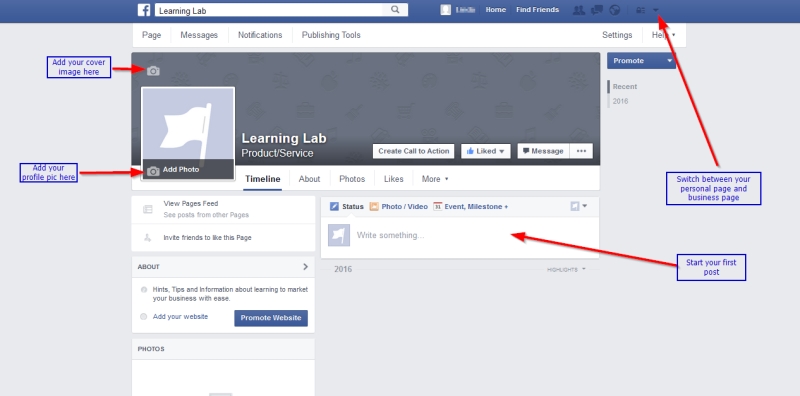
There you have it! Your page. It should look like this (without the arrows of course)
Facebook will popup some info for you and also tell you to like your page which is a good idea.
Done! Thats the page set up. You will be able to switch from your personal and business pages with the drop down menu in the top right corner as shown with the arrows above and now you can add your pics if you haven’t already.
To help you create your cover photo and profile pic, following are some free resources where you can do this…
Some tips for you when designing your photo…
It is recommended your photo be 851 x 315 pixels
Facebook has rules that state that the cover photo cannot include more than 20% text.
Now you just need to populate your page with some content. It’s a good idea to share some things and have a few status updates before you start inviting people to like your page.
So start sharing!
Did you enjoy this article? Comment below and let me know what you thought!


Leave a Reply